Introduction to Perspective Drawing
Perspective drawing is a technique used in art to represent three-dimensional objects on a two-dimensional surface. It creates the illusion of depth and space, making flat drawings look realistic and dynamic. Artists use perspective to guide the viewer’s eye and add a sense of realism to their work. Learning how to create perspective drawings is a key step in improving your overall drawing skills.
Understanding the Basics of Perspective
To begin with, perspective is all about the viewer’s point of view. The way things appear smaller as they move further away and larger as they come closer is the foundation of perspective. The concept revolves around the horizon line, vanishing points, and converging lines. These elements work together to create depth in a drawing. There are mainly three types of perspective used in drawing. One-point perspective uses a single vanishing point on the horizon line and is often used to draw roads, railways, or hallways. Two-point perspective uses two vanishing points and is perfect for drawing buildings or cityscapes from an angle. Three-point perspective adds a third point either above or below the horizon line and is useful for creating dramatic viewpoints like tall buildings seen from below or above.
Choosing the Right Tools
Before starting your drawing, it’s important to gather the right materials. A pencil, ruler, eraser, and good quality paper are essential. A T-square or triangle can also help in drawing accurate straight lines. Digital tools like drawing tablets and perspective grid features in software can also be very helpful if you are working digitally. Begin your drawing by placing the horizon line across your paper. This line represents the viewer’s eye level. Then, choose one or more vanishing points along this line based on the type of perspective you are using. These points are where your lines will converge, creating the illusion of depth.
Sketching Basic Shapes in Perspective
Start with simple shapes like boxes or cylinders to understand how perspective works. Draw lines from the corners of your shapes to the vanishing points. This will help you see how objects change in size and shape as they recede into the distance. Practicing with basic shapes builds your confidence to handle more complex drawings later. Once you are comfortable with the basic forms, you can begin adding details. Think about how windows, doors, and other elements fit within the perspective lines. Make sure every element in your drawing follows the same vanishing point logic so that everything appears consistent and believable.
Shading and Lighting for Realism
To enhance your perspective drawing, add shading and lighting. Choose a light source direction and shade the opposite sides of the objects accordingly. This adds dimension and makes your drawing pop off the page. Shadows should also follow the same perspective to maintain the realistic look. Many beginners forget to keep all lines pointing toward the vanishing point, which can throw off the entire drawing. Overlapping objects without proper perspective adjustment can also break the illusion of depth. It’s also common to place the horizon line too high or too low, making the composition look unbalanced.
Practicing with Real-Life Scenes
Take inspiration from real life. Try drawing a street view, your room, or a row of buildings using perspective. Observing how objects appear smaller in the distance and how they align with the vanishing points will improve your understanding. Photos can also be a great reference to study perspective. Perspective grids are extremely useful for beginners. You can draw your own or find printable or digital templates. These grids help keep your lines straight and maintain the right angles. Digital art software often includes perspective guides that make it easier to create complex scenes with accuracy.
Prompt
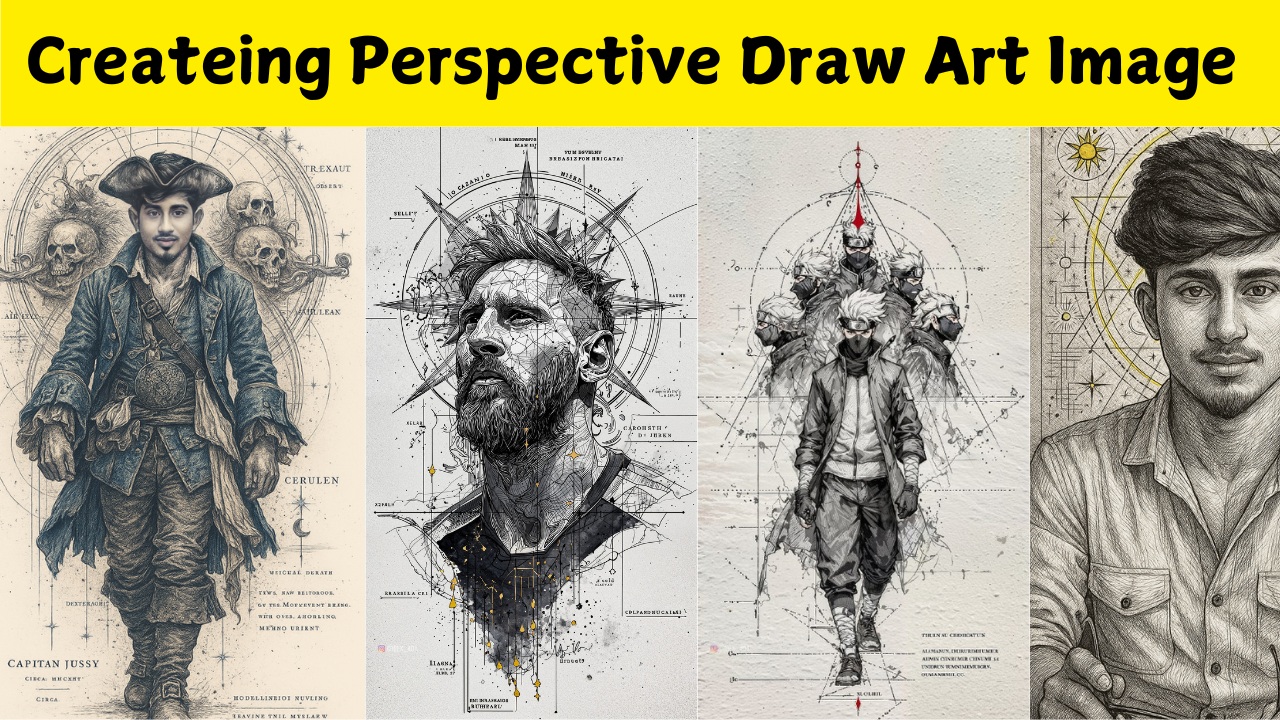
- A stylized portrait of a young man, hyper-detailed ink line art, with abstract geometry and cosmic elements, glowing golden ink drips, dark watercolor splatter background, symmetrical design inspired by sacred geometry.
- “Stylized ink drawing portrait with sacred geometry, blueprint overlays, cosmic grid, and glowing yellow linework, like a futuristic sketchbook.”
- A highly detailed black-and-white digital sketch portrait, realistic ink lines, cosmic symbols, technical blueprint background, yellow highlights, dramatic lighting, symmetrical sacred geometry, inspired by Neymar illustration.
- “A lone ninja with white spiky hair and a blindfold, walking forward, multiple ghostly clones behind him, drawn in manga ink sketch style, surrounded by geometrical diagrams like Leonardo da Vinci’s Vitruvian Man, grayscale with red accent highlights, fine linework, futuristic papyrus background, symmetrical composition”
- “Highly detailed illustration of a fantasy pirate captain walking forward, wearing steampunk Victorian clothes, engraved etching style, celestial background, skulls, vintage map elements, hyper-detailed, monochrome with blue accents, symmetrical composition”
Perspective in Character Drawing
Perspective isn’t just for environments. It’s also used in character drawing to show foreshortening, where parts of the body appear smaller or larger depending on their distance from the viewer. Practicing character poses with perspective helps bring more dynamic action and life into your art. There are plenty of online tutorials, classes, and books dedicated to perspective drawing. Following step-by-step guides can teach you techniques you might not discover on your own. Don’t be afraid to experiment and try new methods as you grow more confident.
Combining Perspective with Style
Once you’ve mastered the rules, you can start bending them to match your artistic style. Some artists prefer a more stylized or exaggerated perspective to give their work a unique look. The key is to understand the basics before playing around with creative interpretations. Creating perspective art images takes patience and practice. The more you draw, the more natural it will feel. Start simple, study the world around you, and keep challenging yourself with new scenes and angles. Over time, you’ll see a huge improvement in the depth and realism of your drawings.